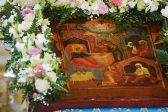
Pascha is approaching. In Orthodox tradition we decorate eggs on Holy Thursday and then go to church to have them blessed on Holy Saturday. Why do we paint eggs ?
Is it the only thing associated with Easter?
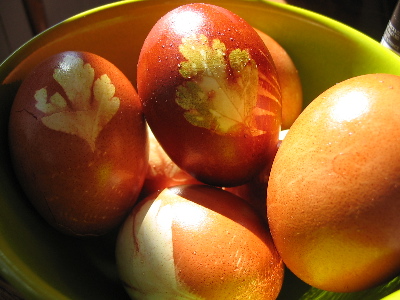
Actually, the first red egg appeared in Rome when Marie Magdalin gave an egg to the Emperor Tybery saying «Christ is resurrected!» He didn’t believe Her and said : «Nobody can be resurrected. It’s as hard to believe as to believe that this egg can become red». And suddenly it really did become red. An egg is not the only symbol of Easter…
Easter is the most important holy day in the Christian calendar. It commemorates the Resurrection of Christ. Interestingly enough, the Council of Nicea in 355 determined that Easter should be observed on the Sunday after the first moon on or following the vernal equinox, a range of thirty-five days.
So Christians commemorate Good Friday as the day when Jesus Christ died and Easter Sunday itself as the day when He was resurrected. Clearly, Palm Sunday is the day on which the palms are blessed. In Russia instead of the palms willow branches are blessed. This tradition also goes back to the times of Christ: when He entered Jerusalem on the Sunday before Easter He was honored by having palm branches and leaves placed in His path. How to decorate eggs There are many methods to decorate eggs. We’ll talk about those which are most popular:
Since old times Easter symbols have been eggs and Kulichi (Easter cakes). Painted eggs are the traditional attribute of Easter breaking of the fast. The tradition of presenting painted eggs to the Day of Jesus Resurrection comes from very old times. By the twelfth century the egg became a must on Easter table. In the Rus the native custom has been to paint with beautiful bright ornaments wooden eggs – pissanki.
Painted boiled eggs are called – krashenki. At Easter different contests were organized with eggs – rolling and fights to check the solidity of egg-shell. Traditional attributes of Russian Easter are Kulich and Paskha. Easter is a beautiful and very interesting holiday that is why everything is prepared with a great care and love.
Cakes are baked and eggs are painted on Maundy Thursday with use of old grandmothers’ recipes.
We offer you the most interesting and harmless recipes to paint eggs:
1. How to paint eggs with birch leaves: To get yellow and golden eggs, people use birch leave. Put young birch leaves (you can use dried) in water and bring to boil, leave to brew for half an hour. Wash eggs and sink in the brew, bring to boil and cook 10 minutes after. Take out and cool down.
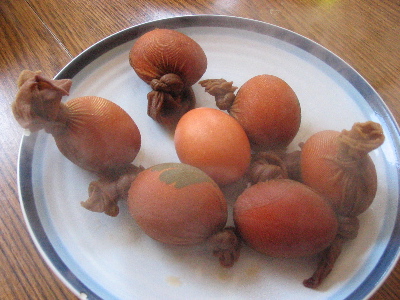
2. How to paint eggs with onion peel: This method is sure to be the most popular one. Onion peel is the most known natural dye. Eggs can be painted in the colors from bright yellow to dark red. The color depends on the concentration of the brew. Put onion peel in water and bring to boil, leave to brew for half an hour. Wash eggs and sink in the brew, bring to boil and cook 10 minutes after. Take out and cool down. To give a special polish, brush the painted eggs with oil.
3. How to paint eggs with vegetable juices: Cook eggs, as you need hard-boiled eggs for this method. Brush an egg with natural beet (carrot, spinach) and let dry out. Even during Soviet time in Russia people used to paint eggs. A woman is describing her associations with Pascha. “For as long as I can remember, Easter has been about painting eggs. Shallow, yes. But some rituals are too lovely to pass up – even if one has thoroughly lapsed in one’s faith, or never had it anyway, and even if one lives in a police state that frowns on religious practice, no matter how frivolous. In the 1980s, of course, nobody could seriously expect to be arrested for egg painting – at most one might get told off at work – and everybody did it. Even if it was Lenin’s birthday, and it made a baby Lenin cry (presumably). It happened once, in my early childhood memory, and my family painted eggs AND lay flowers at the foot of Lenin’s monument, cheerfully reconciling what the Soviet regime had been unable to reconcile for seven decades.
Eggs are a great fun to make, especially if you are a kid. Painting is really a misnomer – traditionally, some eggs were painted, with great skill and regional variation, but eggs for simple eating are usually dyed with onion skins, and come out a beautiful reddish-brown. My family sometimes used food coloring, but there is something almost mystical about lowering eggs into a labyrinth of onion skins and simmering water, and fishing them out a few minutes later, transformed.”
Tawra Kellam describes how to paint eggs with children.
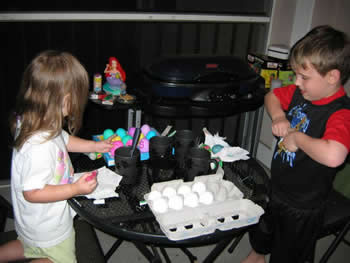
OK, so the kids noticed on the calendar that Easter is approaching and they want to make a huge production of dying eggs. In the past, the little stickers you bought at the store sufficed, but now they want the real thing. Here are some old standards with a few new ideas for you.
One important note: When the kids get really excited about egg dying, don’t feel sorry for them and pour the left over egg dye in their bath water so they can have more fun (no matter how much they beg and plead! Especially if it’s food coloring). Someone might panic and declare a citywide medical quarantine if they see your kids dyed all sorts of strange colors in their Easter finery.
Before you decorate Easter eggs, cover the entire table with newspaper. Keep a huge roll of paper towels or rags handy for messes. Have each kid wear one of dad’s old (now disposable) tee shirts.
Making Easter Egg Stands
Cut toilet paper roll cores into one inch cylinders and use for egg stands. Decorate with stickers or paint.
Decorating Eggs
Traditional method
Hard boil eggs. Fill several mugs with boiling water and add 1-2 tsp. vinegar. Place a few drops of desired food coloring in each mug. Place eggs in mugs for several minutes until eggs reach desired shades.
Remove with a spoon. Place on paper towel to dry. When dry, polish with a small amount of shortening on a paper towel. Buff until glossy.
You can draw or write on the eggs with a light colored or white crayon before dipping. The drawing will remain white after the egg is dipped.
To clean out mugs, put a little bleach water in the cups and soak for a few minutes.
Natural Easter Egg Dyes
If you would like to try dying eggs naturally, try the following:
- Yellow– yellow onion skins, turmeric (Ѕ tsp. per cup water) celery leaves
- Orange–any yellow dye plus beet juice
- Red–beets, paprika, red onion skins
- Pink -cranberry juice
- Blue–blackberries, grape juice concentrate, red cabbage
- Brown–black tea, white oak, juniper berry, coffee, barberry
- Light purple–blackberries, grapes, violets
- Green–alfalfa, spinach, kale, violet blossom plus ј tsp. baking soda, tansy, nettle, chervil, sorrel, parsley, carrot tops, beet tops or dip yellow egg in blue dye
Hard boil eggs with 1 tsp. vinegar in the water. Place dying ingredients in non-aluminum pans, cover with water and boil 5 minutes to 1 hour until desired color is achieved. Use enough material to make at least 1 cup dye. Crush ingredients as they boil to extract as much dye as possible. Strain the dye. Most dyes should be used hot. Let each egg sit in the dye until it reaches the desired color. Some dyes will take longer than others to make the desired colored on the egg. Remove the egg and let dry.
Glitter Eggs– Place 1 tablespoon each of glue and water in a cup. Stir the mixture and then paint the eggs with it. Sprinkle with glitter. This can also add sparkle to already dyed eggs!
Crepe Paper Eggs– Wet a white or dyed egg. Dab torn pieces of colored tissue paper or pieces of pretty colored napkins on the eggs. When the paper dries, the paper falls off and leaves the color behind on the egg.
Decoupaged eggs – Tear small pieces of wrapping paper, napkins, stickers, or clip art. Mix equal amounts of glue and water. Paint egg with glue mixture. Place paper on top and then cover with more glue mixture. Let dry.
Spotted Eggs– Place 1 tsp. of cooking oil in dye. Dip the egg. The oil will cause the dye to make an irregular pattern on the egg.
Waxed Eggs– Dip a portion of the eggs in melted paraffin or candle wax. Then dip them in the dye. Remove from dye. Dry and peel off the wax. The egg will be white on one half and colored on the other half. You can also dip in dye before waxing to get two colors.
Hollow Eggs– Poke a hole in one end of an egg with a very small needle. Poke another slightly larger hole in the other end. Then blow on the small end and the egg will come out the other side. Decorate as desired.


